In my previous post I showed many uses for a near infrared camera. To be clear, this is NOT a thermal infrared camera. Thermal IR cameras image in the mid IR and mainly detect electromagnetic radiation due to the random thermal motion of the atoms and molecules in objects. A near IR camera isn't any different than a regular digital camera that creates images from visible light. It is a digital camera that has been modified to make images from the wavelengths that are just beyond the wavelength humans perceive as red. It is like being able to see an additional color that is invisible to the human eye. In this post I will describe how you can modify a digital camera to be a near IR camera.
Remote Control Using iPhone Selfie Camera
The fact that digital cameras are sensitive to IR is a detriment to
good photography. The lens of the camera is not designed to focus IR,
resulting in a fuzzy picture. The extra IR light can make exposure settings unreliable. To get around this, all digital cameras
have a built in IR cut filter, but some IR still gets through. The
cheaper the camera, the less effective the IR cut filter. You can
demonstrate this by pointing a remote control at any digital camera. When a button on the remote is pressed, the IR
LED on the remote can be seen flashing in the camera display. I first discovered this when my 3 year-old daughter was toddling toward me with a remote control as a took a video. I was startled to see it flashing in the viewfinder but not to my eye. She is now 25. The better the IR cut filter, the dimmer the flashing. New phones cut almost all of it, try using the lower quality selfie camera. The IR cut filter
must be removed to make a near IR camera. This will void the warranty
and possibly wreck the camera. That is why a computer webcam is a good
choice for a near IR camera. They are cheap and easier to disassemble.
IR Cut Filter on a Webcam Lens
Webcams have several types of IR cut filters. The worst is a coating on
the lens. This must be scratched off, that can degrade image quality.
Second worse is a filter attached to the CCD chip. This must be
carefully removed to avoid damaging the CCD. The best filters are part of the lens housing. These can usually be popped out
without difficulty. The IR cut filters are dichroic, they look transparent straight on but usually pinkish from the side. They are worth saving to explore their characteristics with a spectrometer.
I have converted 5 different webcams over the years. Because I like to use a Mac, it was more difficult
do find suitable webcams. Macs have come with built-in webcams for a long time, so few
vendors make Mac compatible Webcams. The most recent near IR webcam I
converted is the Logitech HD Laptop Webcam C615.
It can be purchased for about $25. It was a little difficult to take
apart until I found out I could peel off the flat plastic panels on the
front to reveal the screws. The IR cut filter was glued on to the
lens housing but easily broke off with a quick blow from a pencil. It
worked well with my Macbook Pro and is my only HD near IR webcam. I made a video showing the conversion process for this webcam in case you want to give it a try.
My
other converted webcams are older models but still available as of this
writing. I tried the IceCam2 by Macally. It worked well with my Mac but
unfortunately the IR cut filter was a lens coating. I was able to
scratch it off with an X-Acto knife with acceptable results, but I wouldn’t
recommend it. The Macally MegaCam had a removable IR cut filter and
works well. The only downside is it had a limited range of focus. Next I tried a Logitech QuickCam Connect. Although there was a Mac driver when I made it, currently there isn't one. The IR cut filter was a small square
piece of plastic that easily popped out of the housing. This camera
worked well on a PC and my Mac laptop running Windows. I recommend this
one for PC users. I then tried the Logitech QuickCam Chat Web Camera
because there was a Mac driver available for it. Unfortunately it had an
IR cut filter coated on the lens. I swapped the QuickCam Connect lens with this webcam. This is what I used
until a Mac OS update caused that driver to stop working too!
Once the IR cut filter is removed, replace it with a filter that only passes IR radiation. I use a Wratten #87C filter. Edmund Optics sells one for $175. That is expensive but it would be enough to make many near IR cameras. The
filter is large enough to be attached over the lens of the camera. This allows pictures to be taken with and without it for comparison. I
chose to place it inside the lens housing of the webcam so it is more
secure. I can then use an unmodified webcam for comparison pictures. You can find less expensive Wratten 87C filters on eBay for $30-$40.
Unexposed, Developed Color Film
A
much less expensive filter can be made from developed, unexposed color
film. The resulting dark negative works almost as well as a Wratten
87C, see spectra below. If you look through old boxes of color negatives at your grandmother's house you will probably
find some developed, unexposed sections on the ends of negatives that you can
use. They are the portions that look completely dark. This material will pass IR while blocking almost all
visible. Some people recommend floppy disk material but it passes a lot of the visible spectrum. I
don't recommend it for near IR webcams. However, looking directly
through it gives you an approximate view of what things look like in
near IR.
View of My Classroom Through the Material from a 3.5" Floppy Disk
The figure below shows the continuous spectrum of an
incandescent light (red line). The other curves show this spectrum after
passing through various filters. The sensitivity of the spectrometer was
adjusted to show the spectra at approximately the same scale so the intensity values
can't be compared. The purple line is the IR cut filter that was removed from a
webcam. You can see why these must be removed as most light above the 650 nm wavelength is blocked. The orange curve is the material from a
3.5" floppy disk. Although it passes IR, it also allows a lot of red
and orange light to pass too. The green curve is
developed, unexposed color film. It works almost as well as the Wratten
87C (blue line), letting through only a small amount of visible light. If you use developed, unexposed film as a filter, try doubling it up for better results.
Continuous Spectrum Compared to Spectrum After Pass Through IR Cut, Floppy, Color Negative, and Wratten 87C Filters
You
can use any software that displays a video preview of your webcam to capture images. On a
Mac this is Photobooth if you have a compatible webcam.
For PCs, the software that comes with the Logitech webcams works well. It
has settings for low light levels, still and video capture, and some
basic editing tools. There are many other choices for PC webcam software including ManyCam
A near IR
webcam is very useful in the classroom but awkward for taking around town and country. Many people would have difficulty successfully taking apart a
webcam AND putting it back together in working condition. I know I did.
Another option that overcomes these obstacles is the Sony Nightshot line
of cameras. They have a switch that slides the IR cut filter
out of the optical path. They also have IR LEDs to illuminate objects so
they can be seen in total darkness. I use a Sony MiniDV Handycam DCRHC40 that I purchased new in 2004. There are usually many inexpensive Sony Nightshot cameras for sale on eBay. To convert a Nightshot camera to a near IR camera
all you need to do is place an IR pass filter over the lens. Either a
Wratten 87C or one made from developed, unexposed color film works well.
I made a card stock holder so I can quickly attach and remove the filter to take
near IR/visible comparison pictures. I also cover the IR LEDs with
electrical tape although they are useful for some applications.
My Sony Nightshot Camera With IR Pass Filter Installed and Tape Blocking IR LEDs
Sony
Nightshot cameras have been manufactured since 1998. There was some
media attention when people used them to see through certain fabrics when illuminated with a bright near IR source.
Sony modified them so that they overexpose in bright conditions to prevent voyeurism. This
does not affect their use as near IR cameras because the IR pass filter
dims the image considerably. However, I sometimes have issues with overexposure
in bright sunlight. There is a way to defeat this, set the Nightshot switch halfway between on and off. That is how I took the picture of the billiard balls at the top of this post.
Fabric in Visible Light Same Fabric in Near IR
Another option would be to modify a digital camera like a webcam by removing the IR cut filter and replacing it with an IR pass filter. This is best done with an old digital camera that would not be missed if it refused to work after reassembling it. I tried this with an old Kodak digital camera and it did work for a little bit, then became e-waste. There are companies that will do this but their main purpose is to remove IR cut filters from DSLR cameras to make them better for astrophotography. If you are interested in pursuing this option, here is a clearinghouse of information and here is a good place to start.
I learned how to convert webcams to near-IR cameras by
searching for DIY websites and videos online. This post is an amalgamation of what I have learned from this research and from using near IR cameras for many years. Here are a few websites that I
found useful:
Simone models her scary giraffe costume in visible and near IR
The human eye is
not capable of detecting wavelengths much larger than 700 nm. However, digital cameras have the capability to detect near
infrared radiation a little beyond 1000 nm in wavelength.
This is almost as large a range in wavelength as the entire visible spectrum! Digital cameras are able to detect this electromagnetic radiation and reveal it as images and movies. This allows many creative and novel ways to explore IR radiation in the
classroom and beyond. For example, clothing looks different in near IR
as the above Halloween costume reveals. In this post I will give examples of near IR images I have made. In Part 2 I will describe how to make your own inexpensive near IR camera.
There are many things that can be explored with a near IR camera. One of the more surprising things to observe is paper money. The back of $10, $20, and $100 bills have strips of near IR reflecting pigment that obscure the printing behind it.
The reverse side of a $20 bill in visible and near IR
I remember showing this to a laser physicist and he got so excited he went home and made his own near IR camera, and he worked every day at the National Ignition Facility at LLNL! The patterns are different allowing scanners to quickly and accurately differentiate between denominations as these images of other denominations show.
The reverse side of a $10 and $100 bill in near IR, notice almost invisible 100 on right
The counterfeiting measures on the front of the $100 bill look very
different in near IR. The inkwell disappears revealing the Liberty Bell.
This happens in visible if you tilt the bill. The fountain pen and phrases from the Declaration of Independence
disappear and the security ribbon becomes very faint.
Obverse of $100 bill in visible and near IR
It is interesting to watch appliances like hotplates, toasters, hairdryers,
and a range top burners warming up. These are all easily visible in near IR
even when there is no red glow yet detectable to the eye. The range of brightness is much greater than seen in visible. Below is video of me touching a hotplate when it was just warm but glowing in near IR.
Near IR passes through black plastic bags. You can shine an IR LED through it or place IR emitters like this space heater behind it and see right through the bag.
Visible and near IR image of a black plastic bag draped in from of space heater
Fluorescent light sources are dimly visible, the
warmer ends showing up brighter. Compact fluorescent lights show up brighter than standard fluorescent tubes.
Reflected fluorescent light is mostly invisible. A room illuminated by
only fluorescent light is dark.
My classroom with all the fluorescent lights on in visible and near IR on a foggy morning
Incandescent lights are very bright
and can light up the whole room with near IR. The filament can be seen for a few
seconds after they have been turned off. Different color LEDs are
interesting. Red shows up brighter than other colors. The red LED has a peak wavelength in the visible but still emits light on either side of this peak, some in the near IR. Most of the near IR from the red and other LEDs is probably from thermal radiation. IR LEDs show up as intense lights. Remote
controls have near IR LEDs and can be used as near IR flashlights to “see” objects in an otherwise
dark room.
The red LEDs of my binary clock and shining a remote control on my face in the dark with a remote control shining on it
Smoke and dust particles scatter visible light better than near IR. As a result, near IR reveals distant objects that are obscured in visible light.
South San Fransisco Bay Area from Saratoga, distant mountains only seen in near IR include Mission Peak
There was a small wildfire in North Cascades National Park during our trip in July of 2018. I took several photos of the mountains in visible and near IR. This shot of Colonial Peak turned out the best. Notice the extra details visible in near IR and the smoke is less of a problem. The shadows are more stark, showing that near IR does not scatter as much as visible. Trees reflect near IR more than visible, showing up brighter.
Colonial Peak looms over Diablo Lake in North Cascades National Park
The Los Gatos High School pool looked very different in IR. Very little IR is coming from the bottom of the pool so the lane markings on the bottom can't be seen. The sky reflected from the surface looks dark making it look like a senior prank involving ink has been perpetrated. Other reflections off the pool are more visible like the flags and light poles in near IR.
Los Gatos High School pool in visible and near IR
There are many other things to check out, I won't show them all here. LCD monitors show up as a dull glow with nothing showing from
the display. Some have a bright corner where the back light is located. Red lasers are absolutely dark unless you shine it directly into the camera. The resulting dim glow is probably thermal radiation. Different items of black clothing that looks identical in visible can have dramatically different shades in near IR. Plants tend to reflect a lot of near IR but this varies by species.
I hope I have piqued your interest in near IR imaging. Near IR cameras can be made by modifying a webcam. All you need to do is replace the IR cut filter with an IR pass filter. Another option is to purchase a Sony Nightshot camera and place a near IR pass filter over the lens. You can find used Nightshot cameras on eBay for less than $40. I will describe both of these options in detail in my next post. If you can't wait, there is a lot already posted on the Internet, search "DIY infrared webcam".
I will post as many gems as I can from the American Association of Physics Teachers Summer Meeting held in Washington, DC July 28-August 1, 2018. On Twitter, that's #AAPTSM18. The items may be new or classic; simple or complex. Here's one such gem.
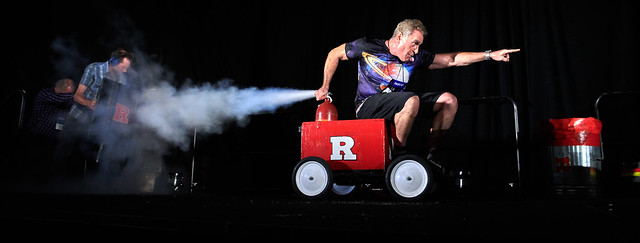
Dave Maiullo shows us his smoke ring cannon, adapted to the constraints of the room. Like most things, ring vortices look even better in slow motion.
I will post as many gems as I can from the American Association of Physics Teachers Summer Meeting held in Washington, DC July 28-August 1, 2018. On Twitter, that's #AAPTSM18. The items may be new or classic; simple or complex. Here's one such gem.
At the "30 Demos in 60 Minutes" session, Colorado State's Brian Jones—director of The Little Shop of Physics and author of College Physics by Knight, Jones, and Field—showed us his secret to winning a tug-of-war.
Those once-ubiquitous single-use plastic bags may be an endangered species as voters outlaw them out of concern for the growing plastic islands and gyres in the oceans. It should work equally well with the thicker multiple-use bags that are now coming online.
I wonder if this will work as well on tile as it does on carpet. It clearly works like a charm on carpet. I guess I'll find out soon enough how well it works on tile.
I will post as many gems as I can from the American Association of Physics Teachers Summer Meeting held in Washington, DC July 28-August 1, 2018. On Twitter, that's #AAPTSM18. The items may be new or classic; simple or complex. Here's one such gem. It is not rare when I spend time with my colleagues at AAPT meetings that I feel like I missed a memo somewhere along the line. If my head is swelling with overconfidence, mixing with my very talented, informed, creative, and knowledgeable colleagues puts me back in my place. Such was the case when someone casually mentioned the use of Google's Science Journal during AAPTSM18. What? I have a bunch of Google apps, but I hadn't heard of Science Journal. Why not? I don't know. Sometimes I'm just not paying attention. Anyway, Science Journal accesses sensors built into phones (or as we older folks think of them: smart phones or cell phones) and manages the data for easy use by phone users, such as students. Take a look. Science Journal Science Journal, an initiative by Google #ScienceJournal I don't allow phone use in my class. Strictly and absolutely. Unless I invite exceptions. Phones are never far from students' hands. Given a green light, the phones can be out and about in no time. I'm not sure if I'll find a use for this in class. But at least I know it's there. Hmmm... experiment-based homework?
I will post as many gems as I can from the American Association of Physics Teachers Summer Meeting held in Washington, DC July 28-August 1, 2018. On Twitter, that's #AAPTSM18. The items may be new or classic; simple or complex. Here's one such gem.
Rutgers University demonstration specialist, Demo a Day co-author, and That Physics Show star, Dave Maiullo, presented many demonstrations, as he does. With trademark Maiullo panache, of course. One of them was the use of Ikea's Ledberg color-changing LED light strip in conjunction with diffraction ("rainbow") glasses. The LEDs in the strip act as nice point-like sources, a controller allows for variation of the emitted color, and the diffraction gratings produce a nice spectrum that changes in correspondence with the LEDs.
Here's Dave's presentation to a group of physics teachers (Session CM: 30 Demos in 60 Minutes). [Note: this is operationally a family affair as many folks in the room know each other and the demonstrators; so the atmosphere is familiar and casual.] As an attendee, I did my best to capture as much of the session as I could. I did better with some demos than I did with others. My rainbow glasses were secured beyond my ability to deploy them while recording the demo. That didn't stop me from trying!
I managed to make an effort to hold the glasses in front of my big camera during the official demo show. A bit slapdash; I'm delighted it worked as well as it did to show the spectra of the LEDs off to the right.
Images from the 2018 Summer Meeting Demo Show, July 31 at the Renaissance Hotel & Conference Center in Washington, DC. Show produced by AAPT's PIRA Team (ft. David Maiullo and Stan Micklavzina) in conjunction with the Bubble Magic of Tom Noddy.
True. And this is the excuse I will give for keeping old vintage equipment that still demonstrates some physics. The same could be said for my father-in-law, a retired hospital mechanic that got to keep a lot of old equipment when it was replaced. He recently gave me a National Twin-Control Transformer, pictured below. It was used in the surgical wards to change the voltage of the lights (left dial) and cauterizing gun (right) from the 120 V wall outlet. I found a few more of these online for sale as interest pieces, luckily no one suggested actually plugging it in. There is an on/off dial at the top and what appear to be banana-type lead ports underneath each control.
The art deco style seem to be from the 1920s or early 1930s. The plastic shell is Bakelite, the first synthetic plastic for which the American Chemical Society named it a National Historic Chemical Landmark. One of its most common applications were casings like this for electric devices because it was very electrically resistant.
I took the front of the case off so that I could see the very large transformers inside. My father-in-law had cut the cord internally, just in case any students decided to get too curious. The transformer wire gauge is quite large and the whole mechanism quite heavy. I took it out to show some students but I'm concerned about some of the wrap components so it will probably be left sealed up in between demos.
It would be interesting to encase the transformer opened up so students could see it but it was safe from curious hands. Its a reminder that what we teach them is actually used for something and hopefully they are able to recognize similar components.
Some of the hesitance that our students have about studying science is this misconception that you can only "do science" if you're "smart enough." Humanizing those that pursue science and their path to a STEM job helps more students consider doing the same. A Twitter account called @RealScientists has a new curator each week to share their particular corner of science with the world. They have a whole week to talk about their specific job, the path they took to get there, publications, unique and funny memories, what they wish everyone knew about their field, etc. Some hashtags have gone viral to show the human side of scientists like #PregnantintheField with which female scientists share pictures of themselves with baby bumps while carrying out field research. The universal #BadStockPhotosOfMyJob hashtag gets really funny when scientists get a hold of it.
While most of us recognize that people come in all different shapes, sizes, colors and backgrounds outwardly acknowledging it is important in your classroom. In a time when many are feeling less welcome in our own spaces (work, home, country, etc) it is vital that we actively work to recognize marginalized groups in our fields and help to lift their voices.
On June 4th a new Twitter account @500QueerSci was launched with the purpose of bringing awareness of LGBTQ+ people working in STEM related jobs during the annual Pride Month. Their goal was to reach 500 personal stories and by mid July were at 630 biographies. People can submit their abbreviated biographies, pictures and social media links to be added to the catalog. The full list is found on their companion website 500QueerScientists.com.
The resource is amazing and as many have said when they first tweet their own featured biographies they wish such a thing had been available when they were young. It serves as a reminder to young LGBTQ+ people interested in science that they are not alone and that can be life changing.
I recently went back to the website hoping to find a search bar to type "physics" into so that I could have a list of many LGBTQ+ people with backgrounds or jobs in the fields of physics. I could not find one so I tweeted at @500QueerSci and asked:
@500QueerSci is there a plan in the works to make the stories searchable by field? I would love to be able to show my students some specific stories of 🏳️🌈scientists in related fields to what I teach.
— Bree BarnettDreyfuss (@BarnettDreyfuss) July 13, 2018
They responded that such a feature was in the works but in the meantime offered to find such profiles for me. Below are the names and links they provided:
So I have a list, now what? I intend to use it. I've seen several lessons and activities in the last year promoting learning about diverse modern scientists, not just the "dead white guys" we find in our textbooks. Depending on your school and community's comfort level you could do a few things with such a list; and the same could be done for scientists of color and women.
Whenever a particular field comes up in class, say astrophysicist, feature an LGBTQ+ person or person of color instead of whoever is at the top of a Google search list.
"Profile a scientist" activities are already usually limited to exclude the few that everyone already knows about like Einstein or Curie or Tesla. If you're going to set restrictions for who they can't research you may find yourself just producing a list from which students have to choose. And look at that, you have a class set (or almost) of physics related names right up there! How convenient!
You can present the list in its entirety, or the full website, for students to explore st their own pace. You can lead a discussion or offer reflection time for students to think about the featured scientists' paths through education and the hardships they may have endured for being LGBTQ+, why their visibility is important, etc.
Make posters of the featured physics related persona biographies to display in your classroom or school all year.
Feature an LGBTQ+, woman and/or person of color that is in the STEM field each week in your classroom.
There are lots more things you could do to help expose your students to a more diverse world of STEM, but that should be a start! I encourage you to read through the biographies above and more to learn more about our very diverse and large STEM community. If you have any other fabulous lessons to share please let me know!
Edit: I was able to add a few more resources I could not find the first time around thanks to recent AAPT plenary Frank Nochese:
The hashtag #ActualLivingScientists is used by all kinds of, well, actual living scientists, to share information about their work and why its cool. Several teachers print out some of these profiles to make displays in their classrooms or around
Heather Waterman @WatermanPhysics makes a daily doodle on her board about a scientists from an underrepresented group. I have a minor in art and I still don't know if I could draw a scene every day that was this good!
Let's say you you were into making solar ovens. Let's say that you decided a few years ago to make the best solar oven ever. Further, let's stipulate that you saw a nearly meter-diameter Direct TV antenna on the side of the road. An idea happened. You rushed to the local plastics store and bought highly reflective Mylar and glued it to the antenna.
Your solar oven was pretty amazing. While the hot spot wasn't super small, it was hot. Really hot. It can pasteurize a liter of water in 15 minutes.
And now you work at the Exploratorium and you think that you might bring it to work for grins. If you forget it in the back of the your Outback face up on a sunny day near the solstice, well, it can melt the molding in a fairly impressive way. I think I was lucky that my car didn't catch on fire.
You might be wondering how I could make such a mistake? I had a lot to carry into the Exploratorium, and the mirror wouldn't fit on the cart. I planned on coming back in a few minutes, but I got busy doing something else, and it slipped my mind. Coming back in the afternoon, I sat in the driver seat and looked into the rear view mirror.
Uh oh.
If you want to make your own parabolic mirror, you can find some excellent instructions here.